How You Can Do More With Weebly Forms
Introduction
Weebly is a wonderful website and ecommerce service that hosts millions of businesses online. Weebly tools make it easy to build a professional, mobile-optimized site and grow your business with integrated marketing and advanced analytics.
In this blog, we will cover some basics about how to add a basic form to a Weebly site and, also, how to expand Weebly's native form capabilities with FormKeep.
Basic Forms In Weebly
Though most users build static web pages on Weebly; the service does offer a simple form way to add a form to a web page. To add a simple Newsletter Sign-Up Form or Contact Form all you have to do is drag the corresponding icon from Build menu (i.e., Build/Basic/Contact Form or Build/Basic/Newsletter Form) as shown below:
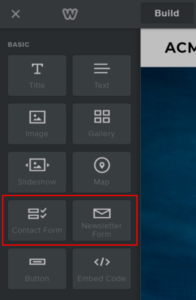
In this example, we have added a simple Contact Form to one of Weebly's standard templates (highlighted in red). This form includes name, email and contact fields.

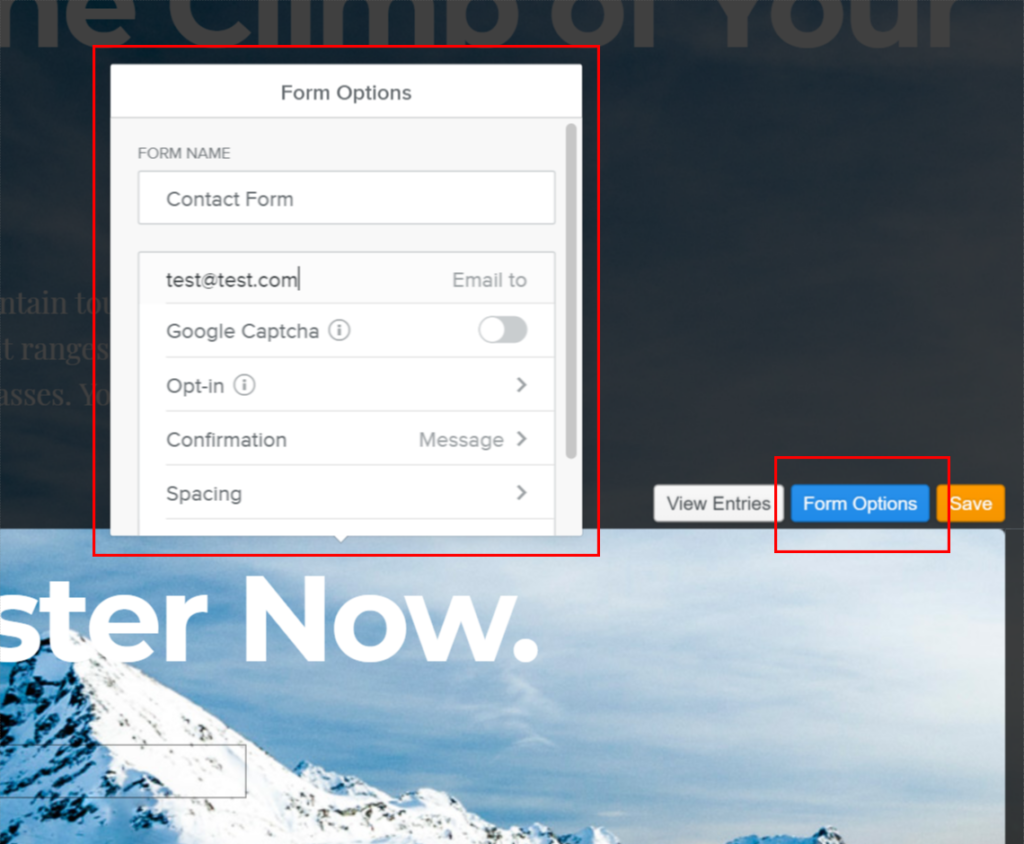
Once the form is in place, there are a number of configurable options. Click on the form element within the Weebly designer and then click "Form Options" to reveal the Form Options panel. Here you will have options for configuring the email that will receive data from the form, Google Captcha spam protection, opt-in and some other settings as you can see below:
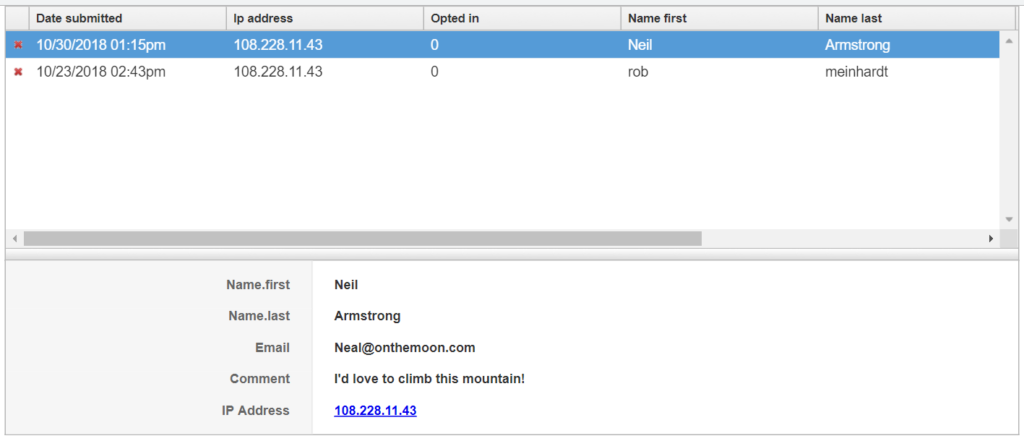
Once your form set up and you've pushed your website into production, your form can begin receiving data. When users submit information via the form you created you will receive an email that notifies you and contains the form data. You can also log into Weebly and access the data by clicking on the form element in the page designer and selecting "View Entries". Here's what the data looks like when you access it via the Weebly console.
Weebly's built-in form builder is very powerful and simple to use. It makes form building easy for many users. However, some users are looking for opportunities to do even more with the Weebly forms. We will explore some of these opportunities in the next two sections.
Controlling The Look And Feel Of Your Forms In Weebly
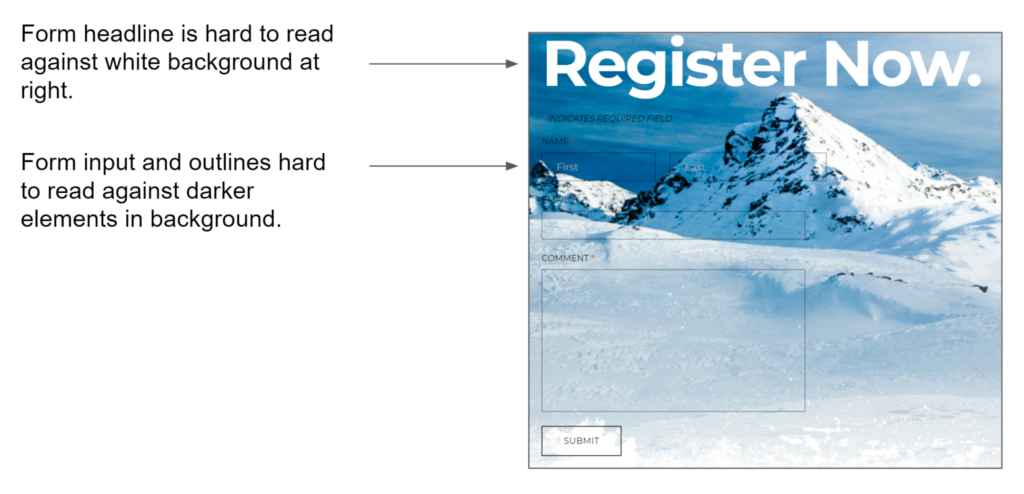
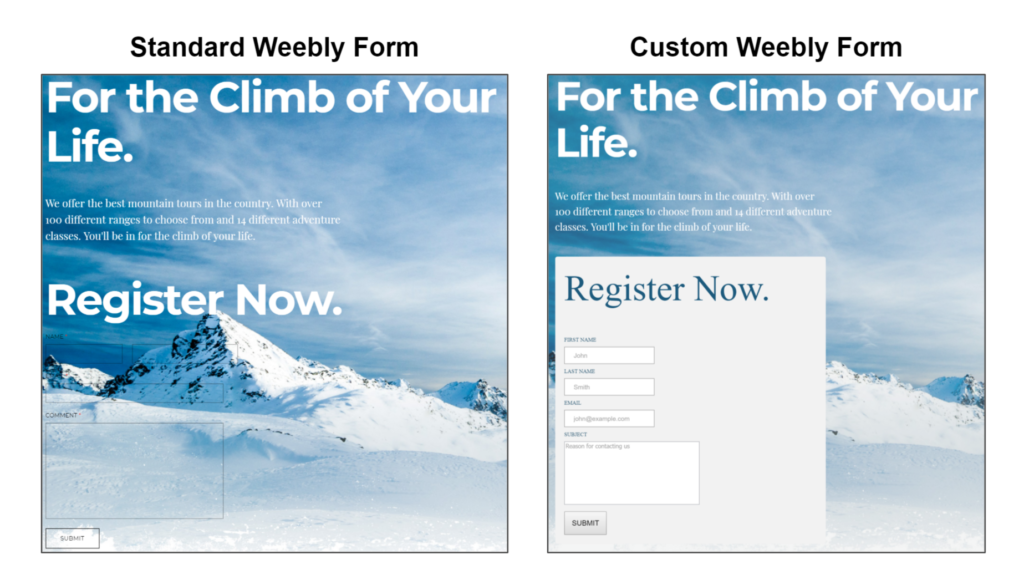
As powerful as the Weebly form builder is for most users, some users want to exert fine grain control over the look and feel of their form. For example, the default form in the example above is a bit hard to see against the background used in the selected template. How can a designer make this form pop out against the background?
Weebly does not offer fine grain control of these elements in the standard form options area. However, Weebly does offer a relatively simple way for developers and web designers to control the look and feel of their form element. Rather than using the included form builder, designers who would like more control can use the Embed Code functionality within Weebly. Rather than dragging the Contact Form or Newsletter Form icons onto your web page, simply drag the Embed Code icon as shown.
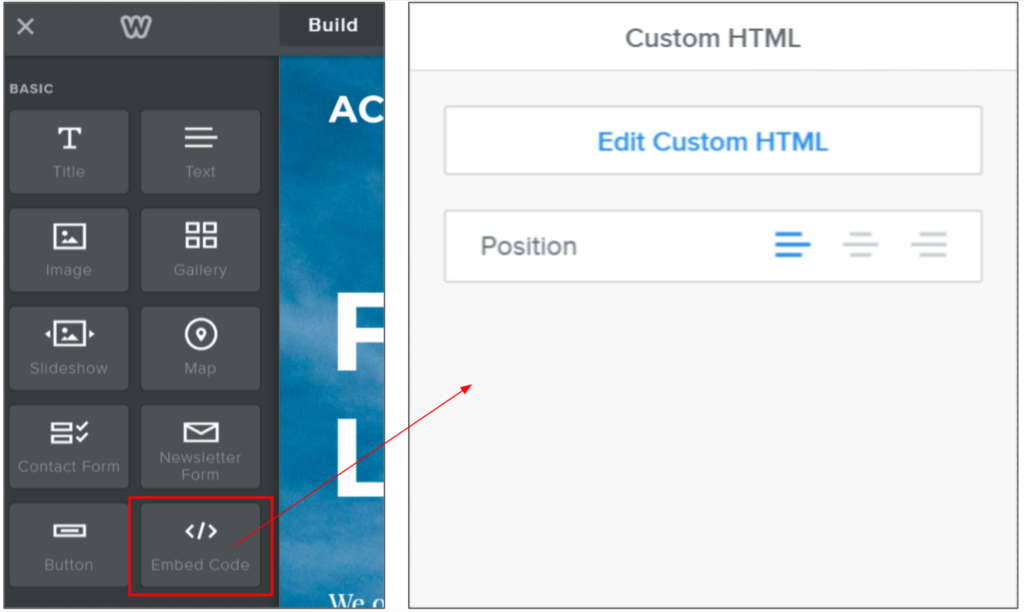
With this embedded control in place, the designer or developer can now custom-craft an HTML form to fit their needs and design preferences. In this example, we used the following HTML to design an enhanced form for this template:
See the Pen Weebly HTML Form Example by FormKeep (@formkeep-samples) on CodePen.
The result, when this code is placed in the Edit Custom HTML widget within Weebly is a form with different styling than the native form tool would normally allow. In this case, the form is formatted with a background that allows the form to become more visible against the template background. See the comparison below.
Obviously, when using the Custom HTML capability within Weebly, the design possibilities are bounded only by your imagination and design sense.
One thing to keep in mind if you use the Custom HTML capability is that you will have to designate a place for your form data to POST information for storage and processing. Weebly normally handles this for you. However, FormKeep makes this easy. You can learn more about how to do this at the bottom of this article. Read more below or click here to skip directly to the appropriate section.
Enhancing Form Data Management and Integration in Weebly
As we discussed earlier, Weebly handles your form data by default in two ways: 1) an email is sent to a designated email address each time a form is completed with the data from that form and 2) the data is accessible via Weebly's interface when an administrator selects "View Entries" in the form widget.
For many applications, this is adequate. However, if any of the following apply to you then you may be looking for some more advanced data handling capabilities:
- Lots of Data:
If you are receiving a lot of data in each form or many form submissions, it may not be convenient and manageable to receive all of the information in an email. - Data Routing:
If you want to route the data to more than one person, it may not be convenient or secure to share the log in credentials to Weebly or route the data through a single email address. - Integration with Other Applications:
If you would like to pass your data on to another system you will need a point of integration that is not available in a standard Weebly form. - Excess Spam:
Google Captcha will reduce but not eliminate spam. Or, you may decide not to use Google Captcha. If you don't want to flood your email inbox with spam submissions, you may want a data management rather than email solution for handling forms. - Field Validation:
If you would like to use custom field validation logic, you can do that with a custom HTML form. - Many Forms On Separate Pages:
If you have a long form or multiple forms broken across several pages, you may wish to view all the data in one place.
In each of these cases (and many others) you may benefit from using a form backend like FormKeep alongside your Weebly site. With FormKeep, instead of routing your form data to Weebly or to email, your data will be stored, secured and accessible in the cloud. From there, you will have a variety of tools to help you manage your form data and route it in a variety of different ways.
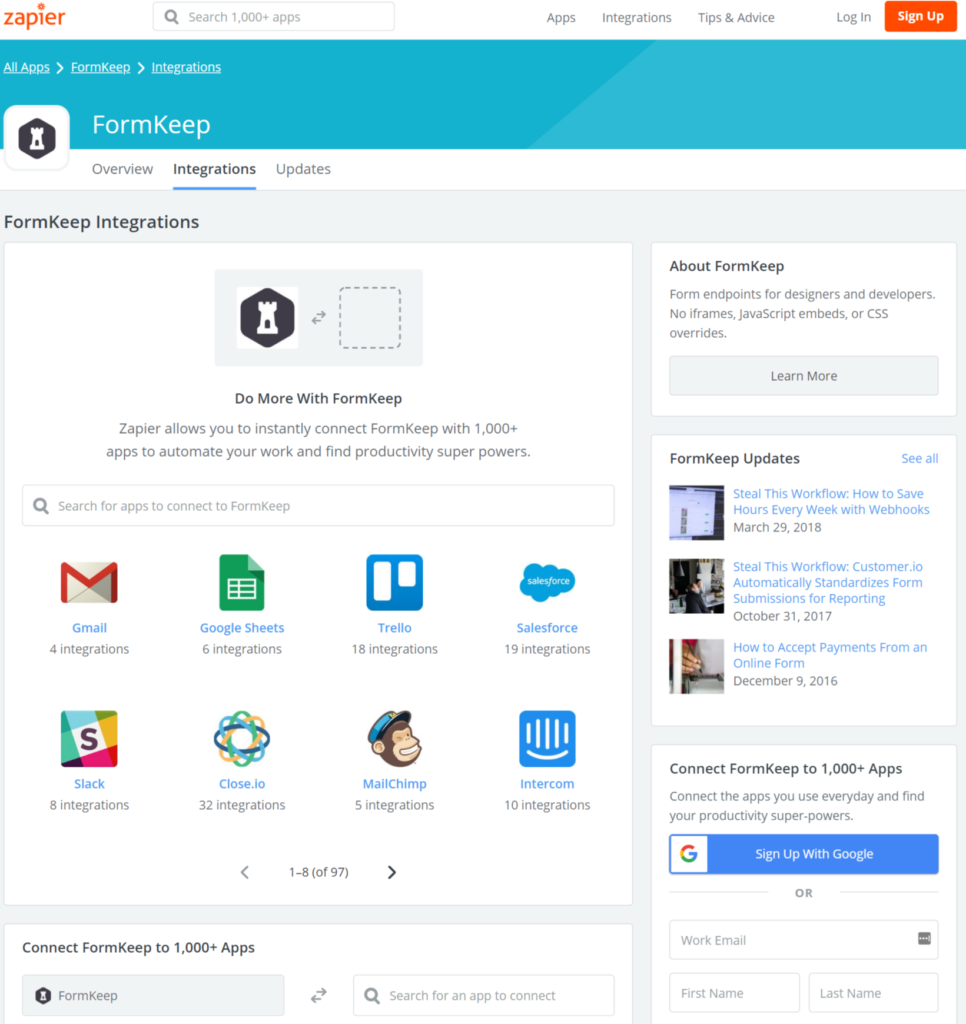
One popular way that designers and developers use FormKeep is using WebHooks or integration via Zapier to feed data to other applications like Hubspot, Constant Contact, Google Gmail, Salesforce, Slack or Mail Chimp, Squarespace (and thousands of others). You can search for over a thousand different integration points between FormKeep and other applications on the Zapier web site (pictured below):
In order to take advantage of advanced data routing capabilities available in FormKeep you will have to place your own custom form into your Weebly page and then point that form to FormKeep.
You can read more about how to create a Custom HTML form within Weebly at the top of this page (Click Here)
Enhancing Weebly Forms with FormKeep
One thing to keep in mind if you use the Custom HTML capability within Weebly is that you will have to designate a place for your form data to POST information for storage and processing. Normally, Weebly handles this for you with their standard form tools. However, fear not! This is where FormKeep makes life easy.
Let's review an excerpt from the form code from the CodePen example above. At the beginning of the form you will notice this syntax (Click Here to View Above):
    <form action="https://formkeep.com/f/exampletoken"
          accept-charset="UTF-8"
          enctype="multipart/form-data"
          method="POST"
          target="_blank"
          id="weeblyform">
All you need to do is update the action attribute in your form. Your form tag should look like the example above paying careful attention to exampletoken to the token provided to you within FormKeep (free or Paid account). You can create one of these tokens for free by signing up for a free account at FormKeep!
Once you've created your HTML form and configured the action attribute, the data will be posted directly to your FormKeep account. From there, you have the option to configure many settings such as spam suppression, thank you pages and re-directs as well as integrate your form with thousands of other applications via Zapier.
You can experiment with this in the FormKeep demo environment in CodePen by clicking here.
If you would like help getting FormKeep setup with Weebly, feel free to reach out to our friendly team at support@formkeep.com.
You can also check out our other blogs discussing how to setup your forms in other tools and platforms. We have an entry on WordPress Forms!